All About Bleeds
What is a bleed and why do you need it?
In printing, bleed is extra color that goes past the edge of where the sheet will be trimmed. In other words, bleed is the area to be trimmed off. When printing, the sheet can shift slightly as it feeds through the printer. To compensate for this shifting, we add an 1/8" bleed. This gives us a little wiggle room when trimming. If a print does not have a bleed, some sheets might end up with a small white border after trimming.
When do you need a bleed?
If your design has a color background or images to the edge of the page, you need to add a bleed.

NEEDS a bleed
Why? The image touches the edge of the page.

NEEDS a bleed
Why? There is a background color.

NEEDS a bleed
Why? Design elements touch the edge of the page.

DOES NOT need a bleed
Why? White background and nothing touches the edge.
What products need a bleed?
Any marketing materials, such as flyers, postcards, posters, door hangers, etc.
Stickers and decals
Business cards
Booklets and Folded Brochures
Greeting Cards
How to Add a Bleed in Canva
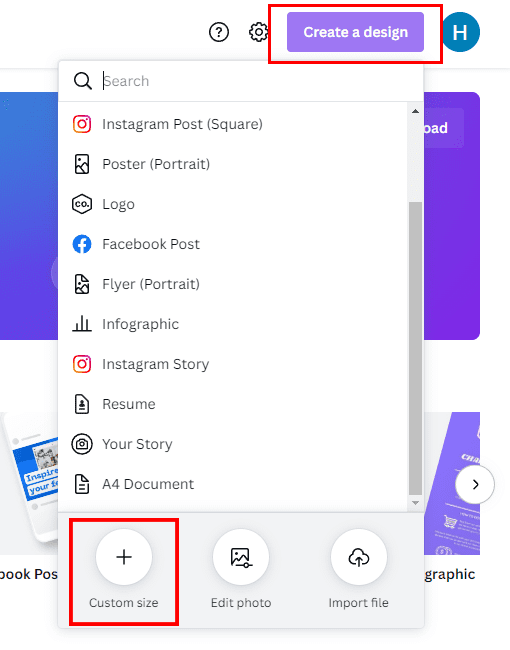
1. Go to canva.com and click "Create a design"
2. Click "Custom Size" and enter the dimensions of your design
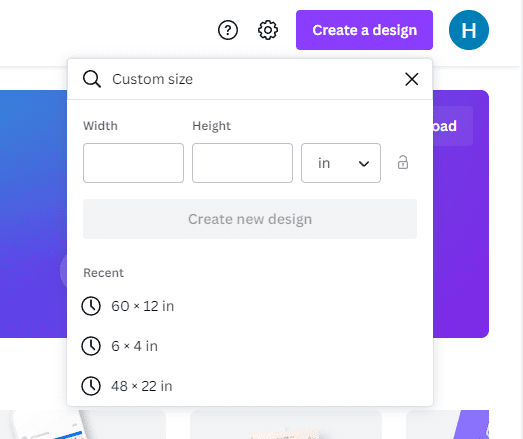
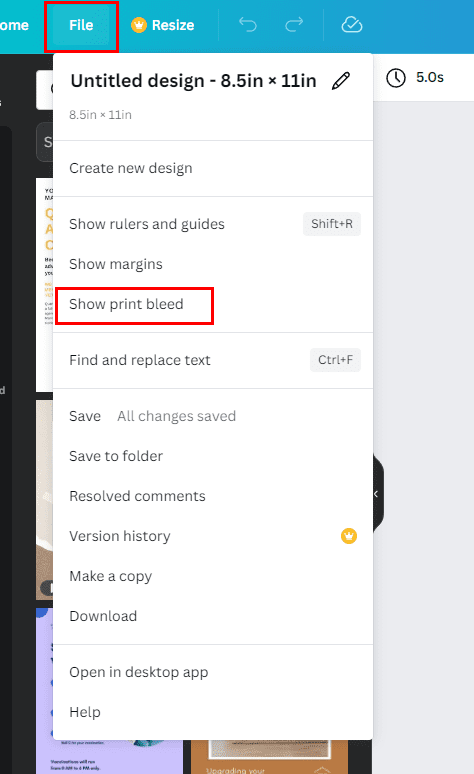
3. After the page opens with your artboard, go to File > Show print bleed
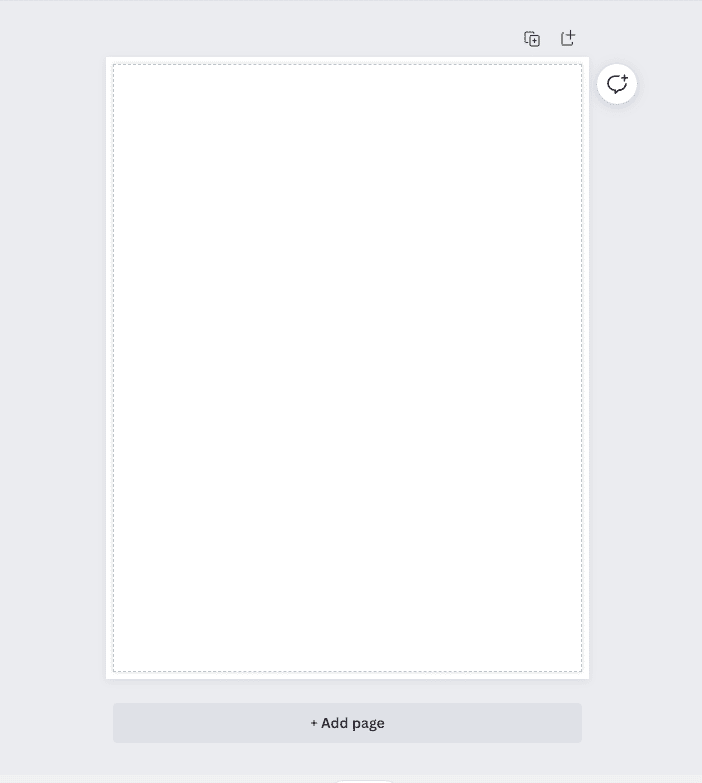
4. This creates an extra 0.125 inch border around your artboard, all images, design elements, and backgrounds must extend into this bleed area.
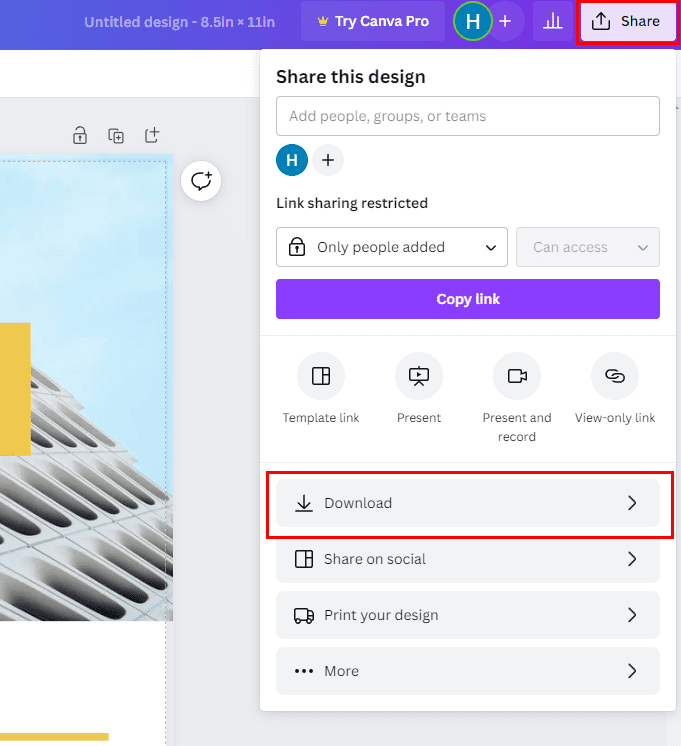
5. To save, go to Share > Download
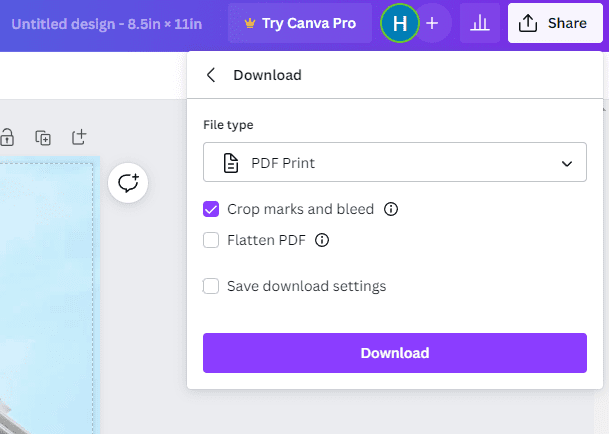
6. Select "PDF Print" as the file type
7. Check the box that says "Crop marks and bleed", this will download a print ready file with a bleed
How to Add a Bleed in Adobe Illustrator
1. Open Illustrator and click File > New
2. Type in the document size and page count
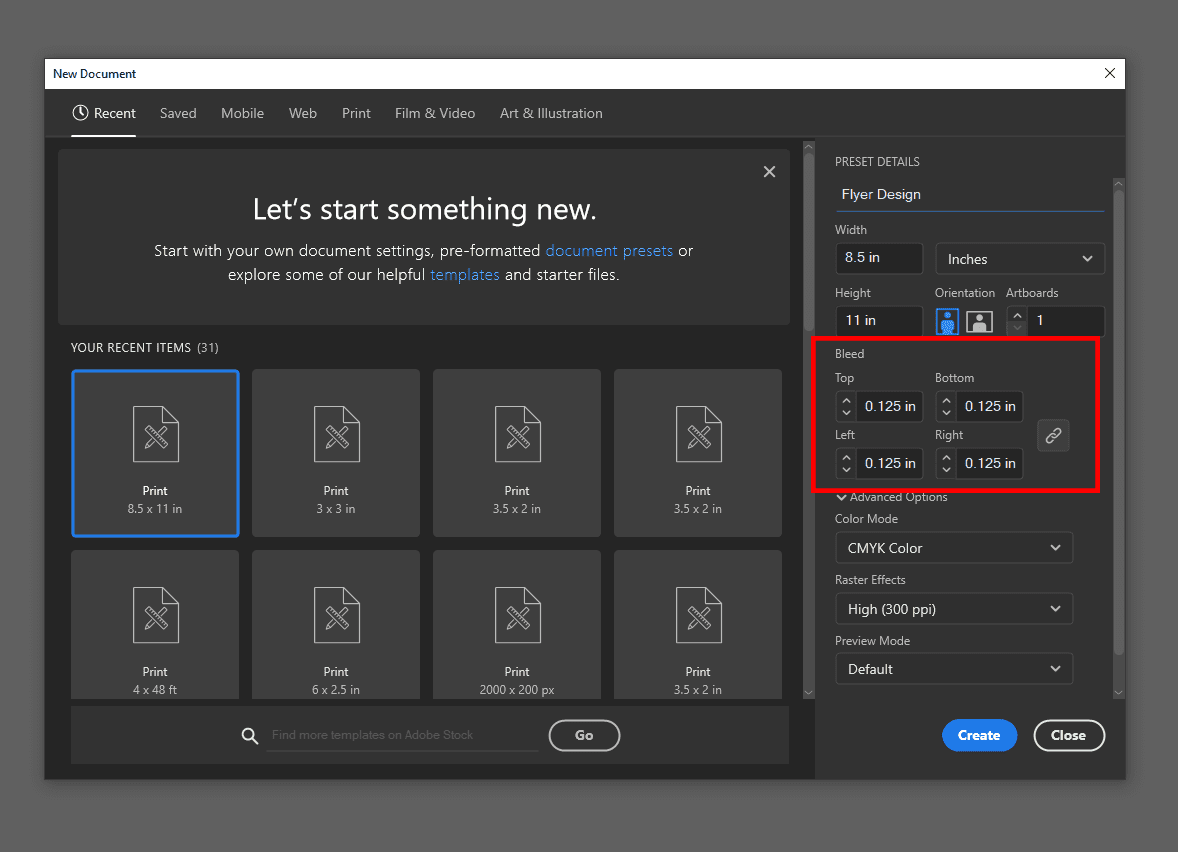
3. To add a bleed, go to the section labeled "Bleed" (highlighted by red box in photo). Type "0.125 in" in one box and all 4 boxes will auto-populate.
4. Below is what your artboard will look like. The edge of the bleed is the outer red line. All images, design elements, and backgrounds must extend into that red bleed box.

5. To save, go to File > Save or Save As
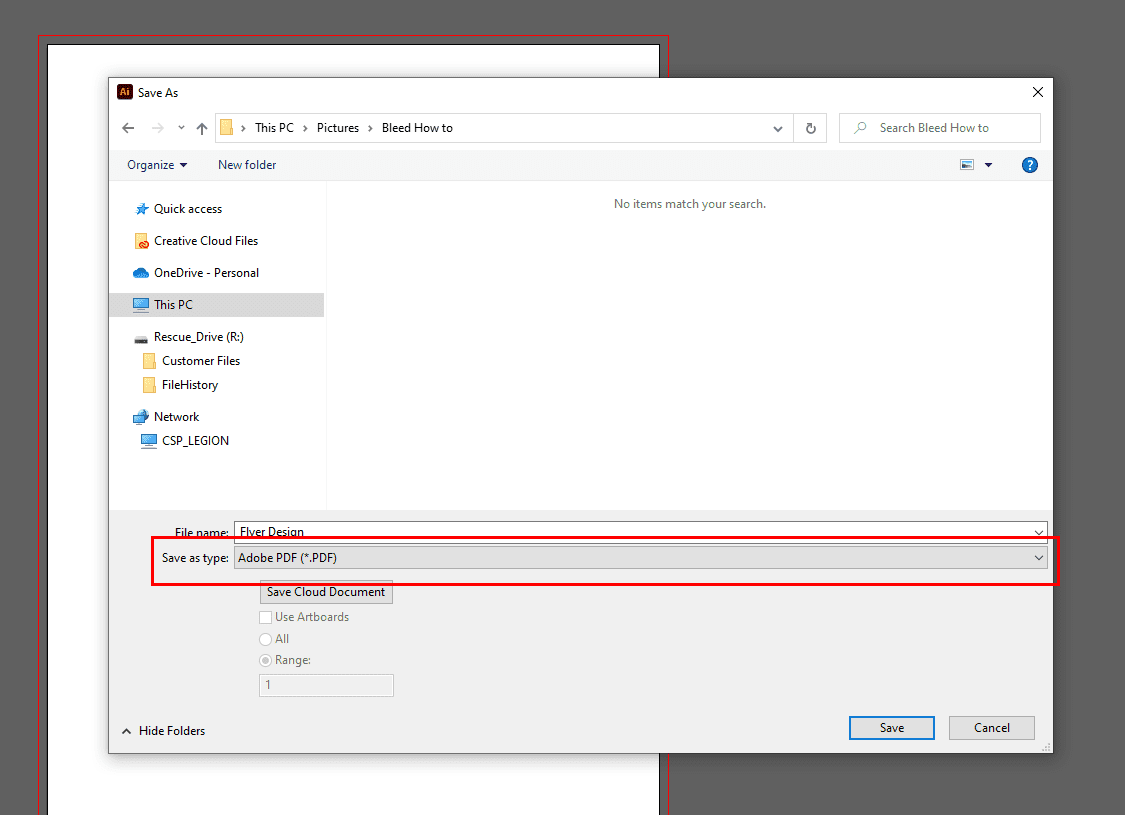
6. Select "Adobe PDF" as the file type to save and a dialog box will open after you click "Save"
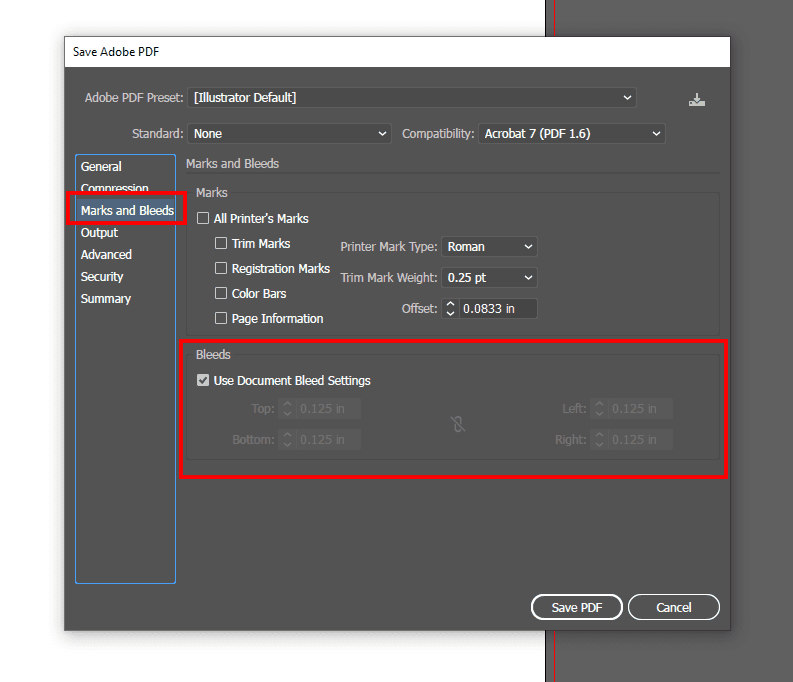
7. Go to the tab that says "Marks and Bleeds" and check the box that says "Use Document Bleed Settings" if it is not already checked. At this time you can also choose to add trim/crop marks if you would like, but they are not required.
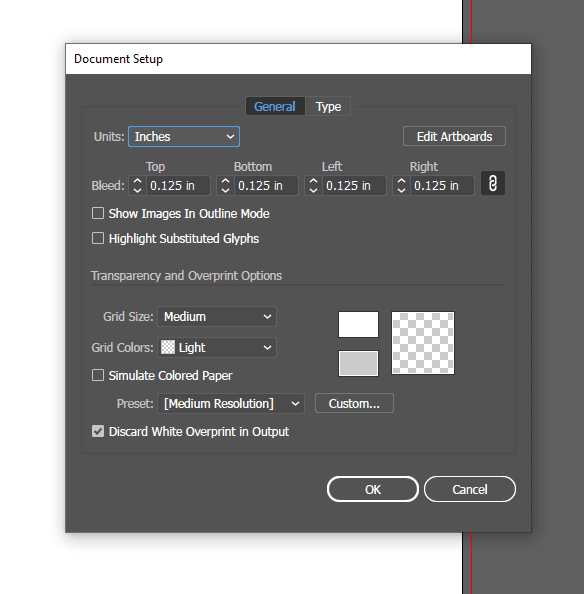
If you are adding a bleed to a file you already created, go to File > Document Setup. A dialog box will open, there you can set your bleed by typing "0.125 in" in the 4 boxes.
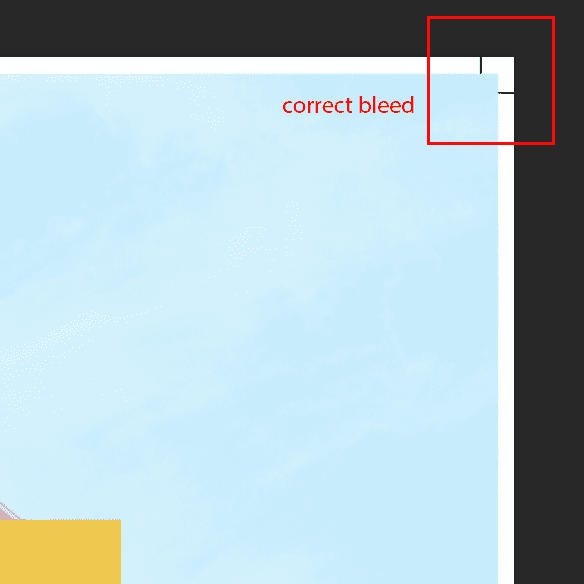
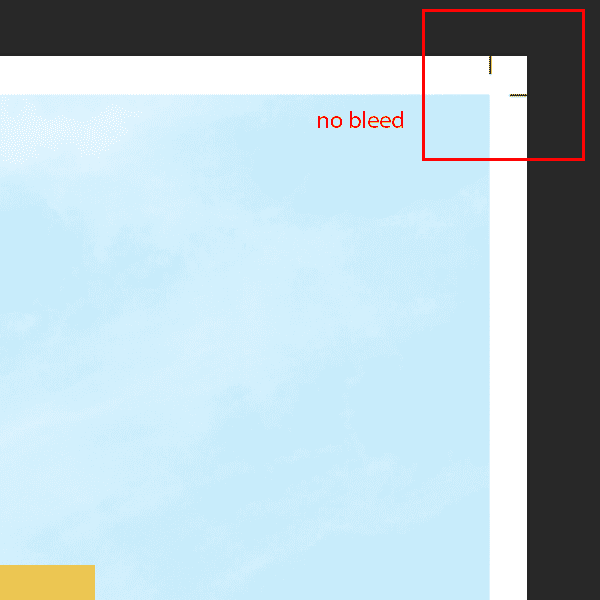
How to know your file was exported/downloaded with a bleed?
If you have any additional questions or need further help setting up your file, please reach out to us via live chat, email, phone, or schedule a video call through the Virtual Print Shop.
